Flock by Freelancer

Flock for engineers

Engineer guide

Everything you do on a Quest battery visit, in the order you do it. Each step shows the screen in the App, what to press, and what to do when something is not right.

$180for the first device on a visit
$120for each extra device on the same trip
10 daysfrom the call to being on site
6 photosthe least a visit can be closed with

Before your first job

1

Sign in

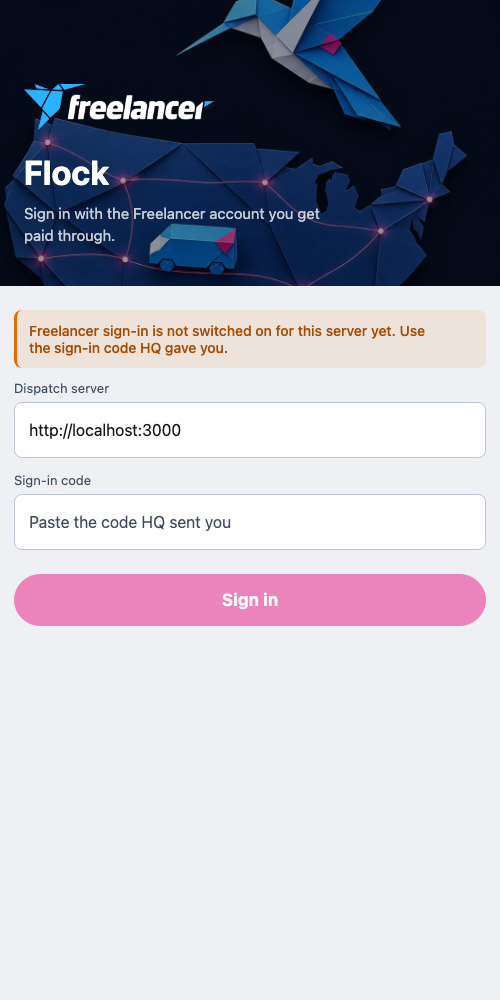
The App is installed from a link HQ sends you. It works like an app on your home screen and keeps working with no signal.

  1. Open the link HQ sent you, and on an iPhone choose Share, then Add to Home Screen. On Android choose Install.
  2. Open Flock from your home screen.
  3. Paste the sign-in code HQ gave you and press Sign in.
If it goes wrong
  • Code not accepted: check you copied all of it, then ask HQ for a new one.
  • Could not reach the server: you have no signal. Try again where you have some.
Sign in
2

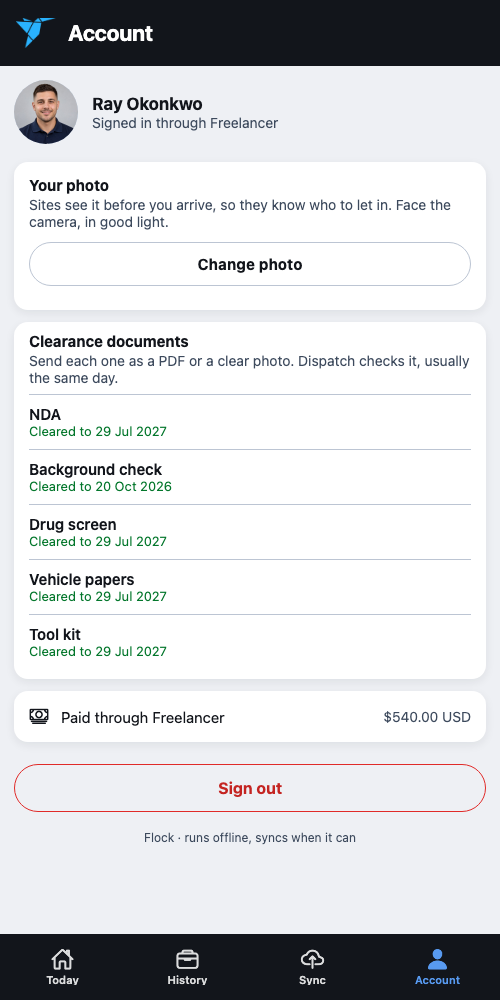
Add your photo and send your clearance papers

Sites see your photo before you arrive, so they know who to let in. You cannot be given Quest work until all five checks are cleared: NDA, background check, drug screen, vehicle papers and tool kit.

  1. Open Account in the bottom bar.
  2. Press Take a photo. Face the camera, in good light.
  3. Under Clearance documents, press Send beside each one and choose a PDF or a clear photo.
  4. Each turns green, with its expiry date, once HQ has checked it. That is usually the same day.
If it goes wrong
  • Not accepted. Call dispatch. HQ could not use what you sent. Ring them to find out why, then send a new one.
Add your photo and send your clearance papers

Your day

3

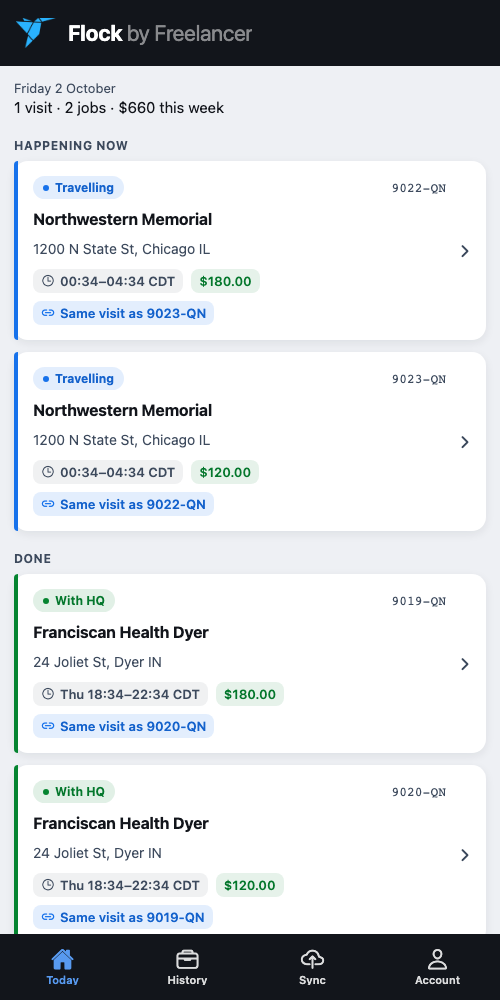
Read your day on Today

Today is everything on your plate, grouped by what needs you first. Times are in the site's own time zone, the clock the site contact and HQ use.

  1. Happening now is the visit you are on. Tap it to carry on.
  2. Still to finish is a visit the customer has signed for where you still owe something, usually the old battery at a recycler.
  3. Coming up is what is next, soonest first. The coloured bar on the left of each card is its state: blue under way, orange waiting on something, red a problem, green done.
  4. Chips under the time warn you: a red or orange timer is a deadline running out, and No tracking means Quest has not sent the battery yet.
Read your day on Today
4

Watch for deadlines

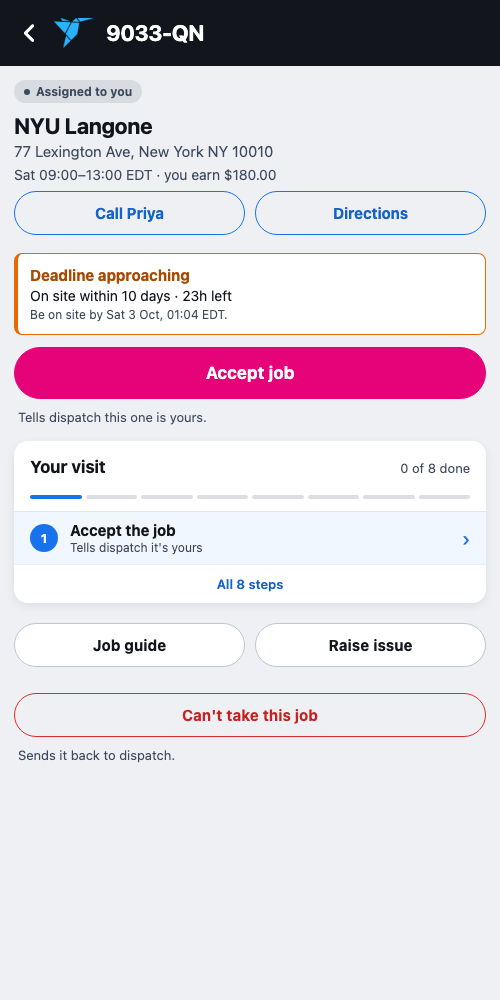
Quest's contract gives us 10 days from their call to being on site. When a visit is inside its last two days, the card and the job show it, so you see it before HQ has to ring you.

  1. Open the job and read the banner. It tells you the exact time to be on site by, in the site's time.
If it goes wrong
  • Past the deadline: get there as soon as you can, and ring HQ to say when.
Watch for deadlines

Getting there

5

Accept the job

A job HQ gives you shows as Assigned to you until you accept it. Accepting tells HQ it is yours, and they tell Quest your name and ETA.

  1. Open the job from Today.
  2. Check the day, the site and the pay at the top.
  3. Press Accept job.
If it goes wrong
  • You cannot do it: press Can't take this job, then Hand it back. HQ gives it to someone else.
Accept the job
6

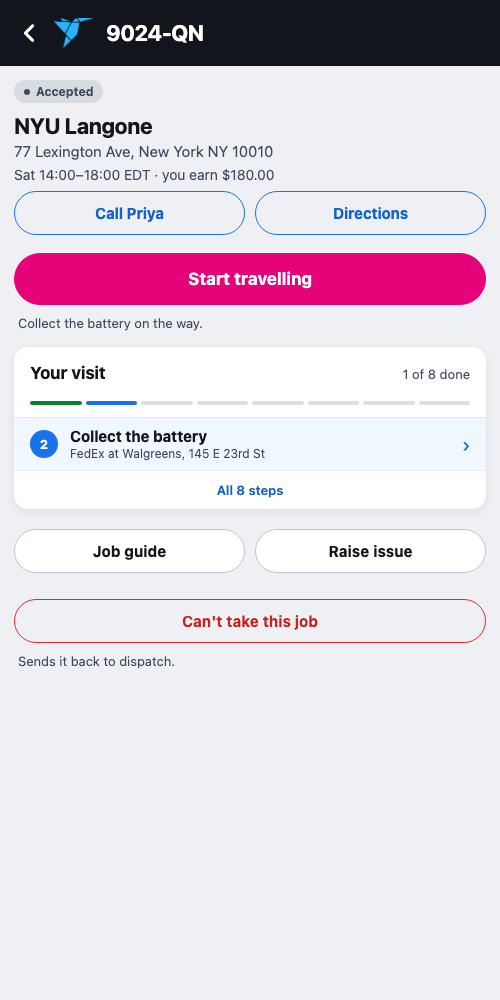
Ring the site, then set off

The contract says we ring the site contact before every visit. The battery is shipped to a FedEx counter for you; you cannot set off until Quest has sent its tracking number.

  1. Press Call to ring the site contact and agree the time.
  2. When you leave, press Start travelling. The App starts recording your route, which is how arrival is proved.
  3. Press Directions for the way there in your maps app.
If it goes wrong
  • Quest hasn't sent the tracking number yet: wait. The button appears as soon as it lands, and HQ is already chasing it.
Ring the site, then set off
7

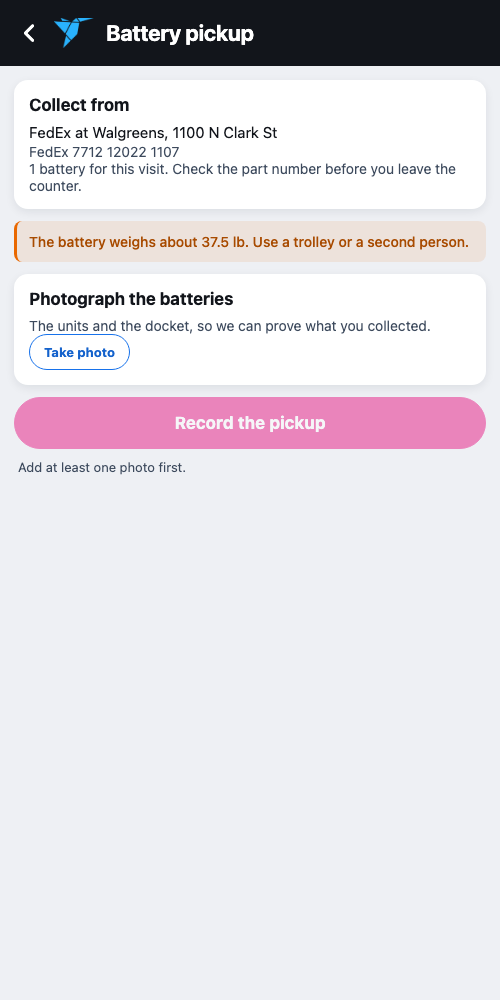
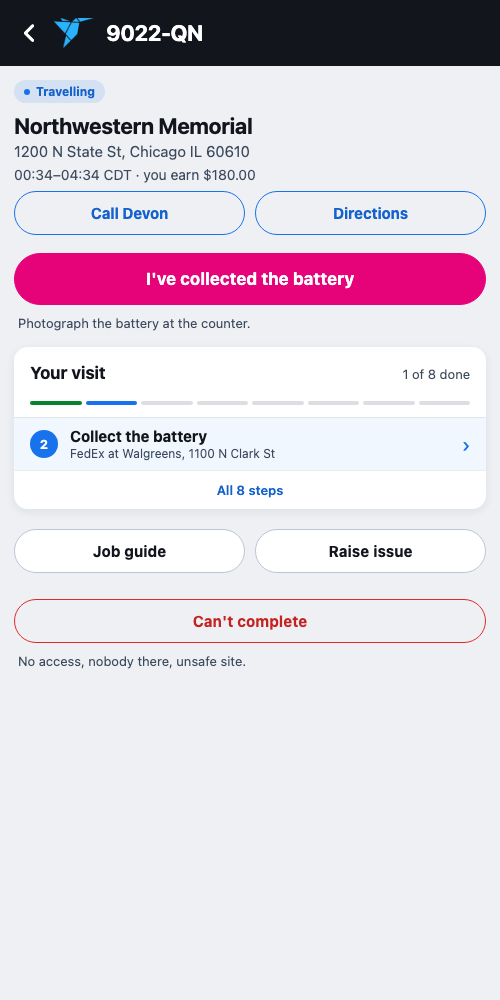
Collect the battery

Collect the battery from the counter on the way. It weighs about 37.5 lb, so use a trolley or a second person. The photo proves you collected it.

  1. At the counter, check the part number on the box against the job.
  2. In the App press I've collected the battery.
  3. Take a photo of the battery and the docket, check the count, and press Record the pickup.
If it goes wrong
  • Wrong part, none there, or damaged: don't drive to site. Press Raise issue and choose Parts wrong or missing.
Collect the battery
8

Arrive on site

Arrival is confirmed against your location, so it only works at the site. It starts the clock on your visit and the time Quest sees.

  1. When you are at the site, press I'm on site. Allow location if your phone asks.
  2. Press Start work when you are with the device. The checklist opens.
If it goes wrong
  • You look too far from the site: move closer to the building, or step outside for a better fix, and try again.
  • Nobody there, no access, or unsafe: press Can't complete and choose the reason. HQ decides what happens next.
Arrive on site

On site

9

Do the work and take the photos

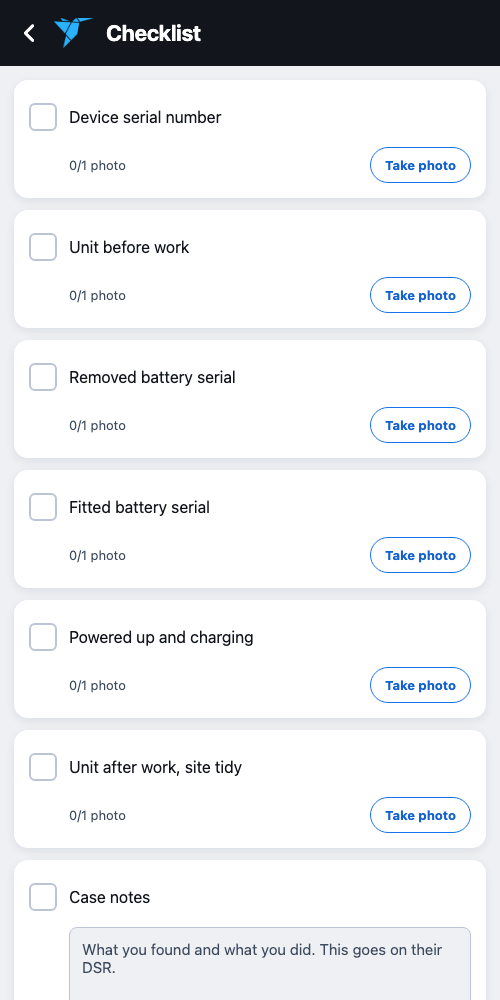
The checklist is what Quest checks before they pay us, and what HQ checks before they pay you. Every step with a camera needs its photo, and the case notes go onto Quest's report.

  1. Work down the list. For each step with Take photo, take the photo as you do it.
  2. Write the case notes: what you found and what you did, in a sentence or two.
  3. Press Record serial numbers and fill in all three serials (see the next step).
  4. When nothing is left, press Work complete.
If it goes wrong
  • No signal: carry on. Photos and ticks are saved on the phone and sent when you have signal; the step says still on this phone until then.
  • The device is not the one on the job, or already damaged: stop. Press Raise issue and choose Device damaged or not as dispatched.
Do the work and take the photos
10

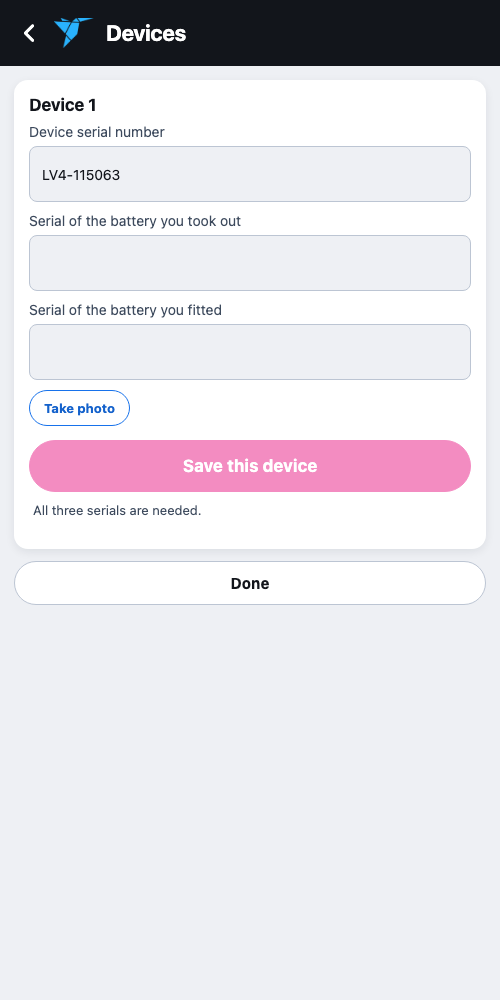
Record the serial numbers

An adverse incident has to be reported by model and serial, and nobody can read a serial off a unit that has been closed up and left. Each device needs three.

  1. Type the device serial off the label on the unit.
  2. Type the serial of the battery you took out, then the battery you fitted.
  3. Take a photo of the label, then press Save this device. It shows Recorded.
Record the serial numbers
11

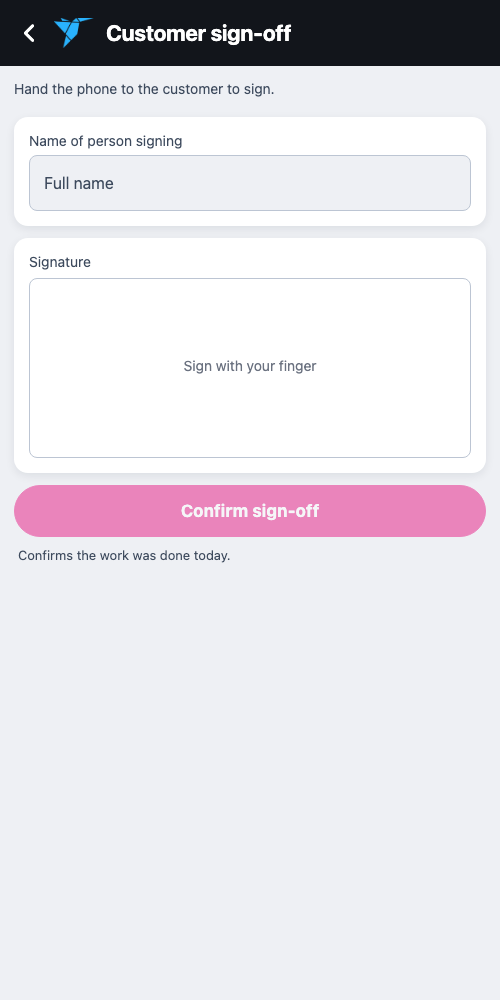
The customer signs

The signature is taken on your phone, on site. Its location is recorded with it, which is what makes it count in a dispute.

  1. Hand the phone to the customer.
  2. They type their name and sign with a finger in the box.
  3. Press Confirm sign-off. The App goes straight to the one question.
The customer signs
12

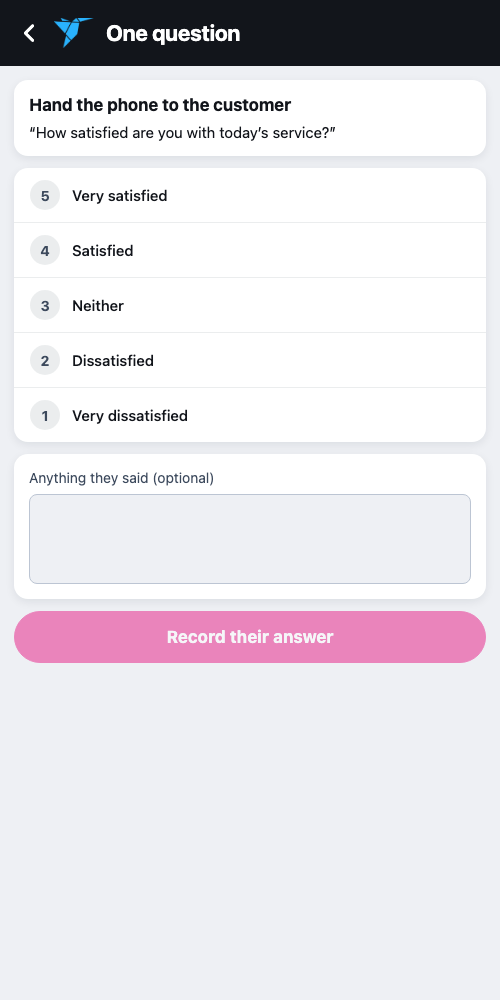
Ask the one question

Quest's contract measures customer satisfaction from this one question, so ask it every time, before you leave.

  1. Hand the phone back to the customer and let them choose from 5 to 1.
  2. Add anything they said, if they want to.
  3. Press Record their answer. A low score is information, not a mark against you.
Ask the one question

After the visit

13

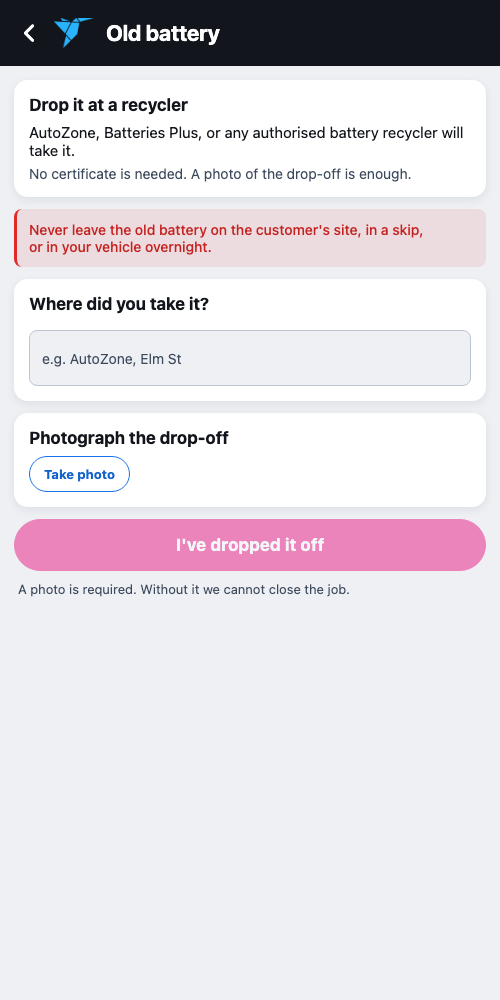
Drop the old battery at a recycler

The visit is not finished, and you are not paid, until the old battery is recycled. Never leave it on site, in a skip, or in your vehicle overnight.

  1. Take it to AutoZone, Batteries Plus or any authorised recycler.
  2. In the App open the job (it is under Still to finish) and press I've dropped the old battery.
  3. Type where you took it, photograph the drop-off, and press I've dropped it off.
Drop the old battery at a recycler
14

Send it to HQ

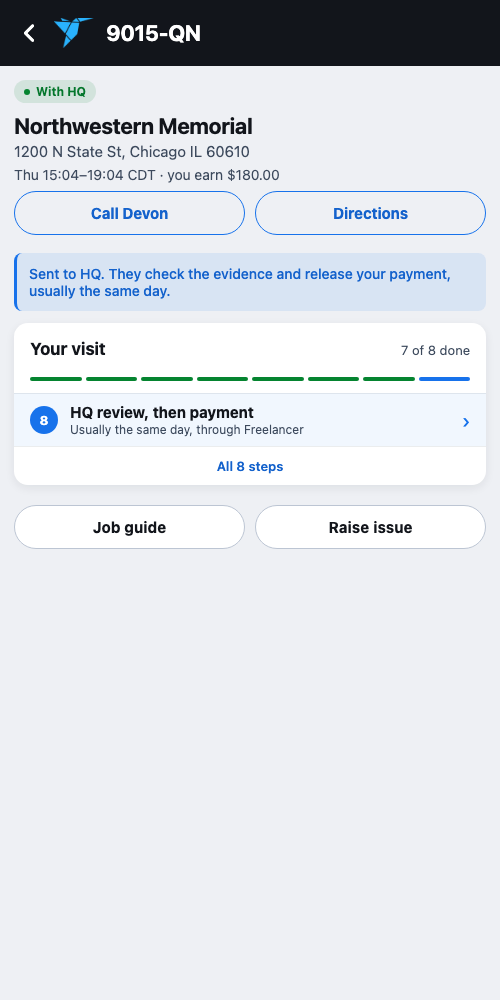
Once everything is in, HQ checks the evidence and pays you through Freelancer, usually the same day.

  1. Press Send to HQ.
  2. The job moves to With HQ. You are told when it is paid.
Send it to HQ
15

See what you have been paid

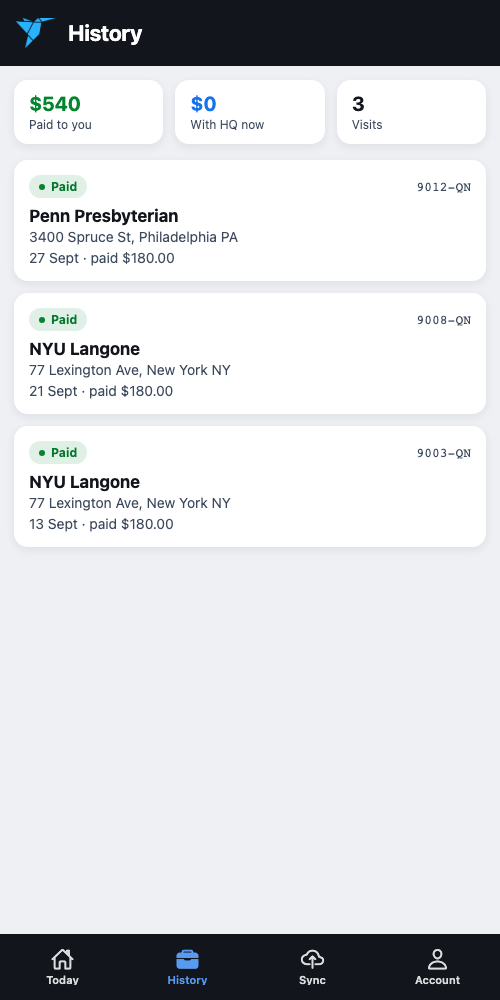
History is everything finished in the last 90 days: what has been paid, and what is still with HQ.

  1. Open History in the bottom bar. The totals at the top are paid to you, waiting with HQ, and the number of visits.
See what you have been paid
16

Check nothing is stuck on the phone

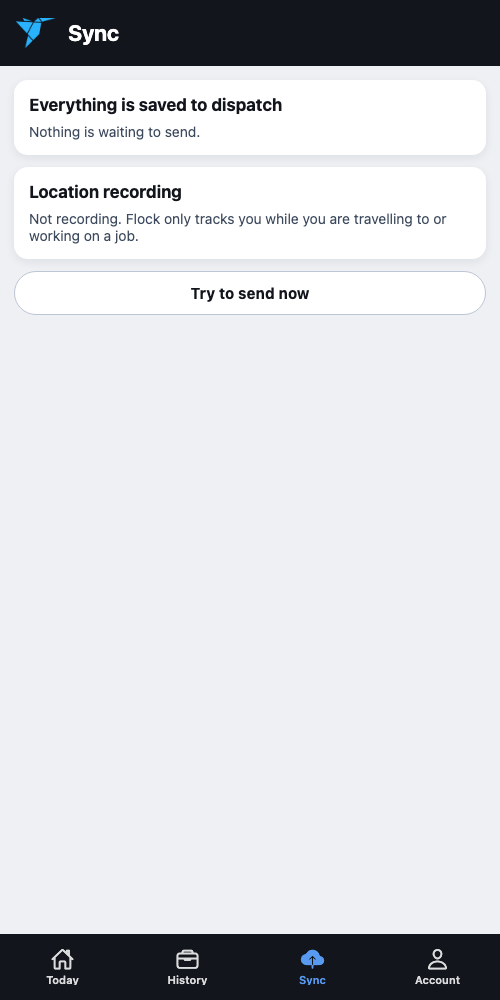
Everything you do is saved on the phone first and sent when there is signal. The Sync tab shows anything still waiting, and anything HQ did not accept, with the reason.

  1. A number on the Sync tab is updates still on the phone. Press Try to send now when you have signal.
  2. An alert on the tab means HQ refused an update. Read the reason, press Open the job to put it right, then Got it.
If it goes wrong
  • Signing out with updates waiting: the App will not let you, so nothing is lost. Get signal first.
Check nothing is stuck on the phone

When something goes wrong

17

Raise a problem

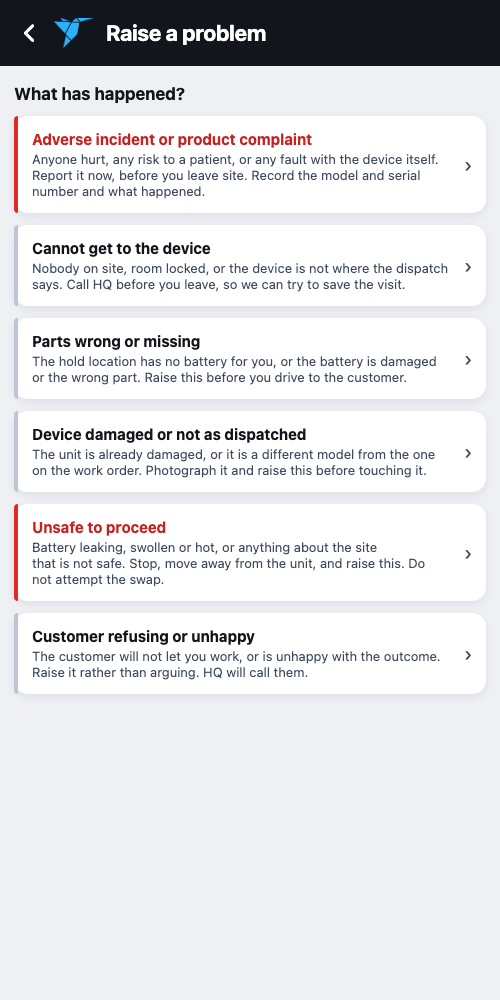
Raising it in the App tells the right person straight away, with the job attached. The red ones are reported to Quest within the hour.

  1. On the job, press Raise issue.
  2. Choose what has happened. Each one says what to do while you wait.
  3. Describe it in your own words and press Report this problem.
If it goes wrong
  • Anyone hurt, or a risk to a patient: choose Adverse incident and report it before you leave the site.
Raise a problem
18

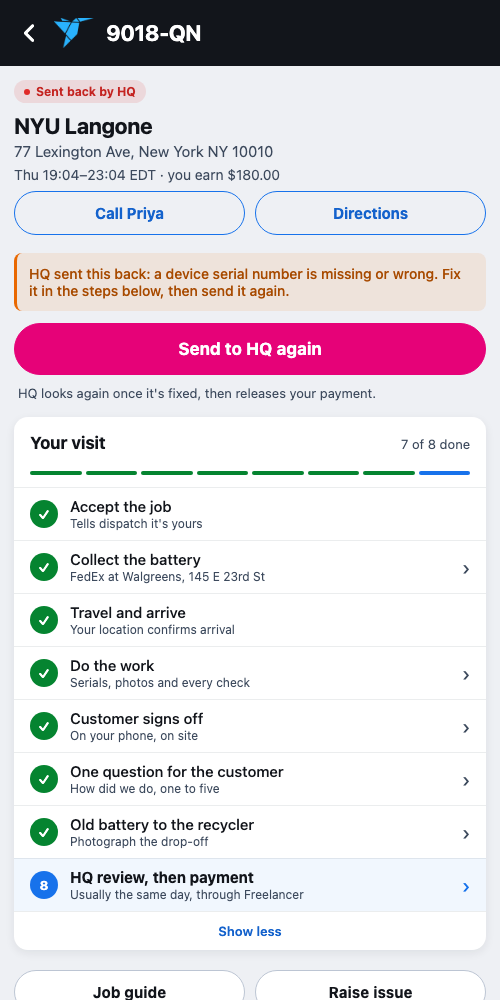
If HQ sends it back

If something is missing, HQ sends the job back with the reason. It shows red as Sent back by HQ on Today, and you are not paid until it is put right.

  1. Open the job and read HQ's note at the top.
  2. Open the step it is about, for example Do the work for a missing photo, and add what is missing.
  3. Press Send to HQ again.
If HQ sends it back
19

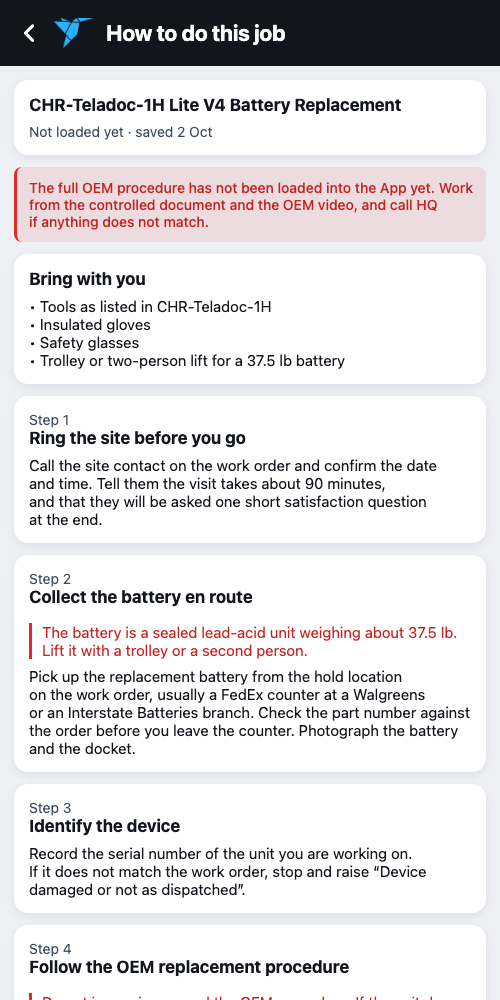
Read the job guide

The guide is the procedure for this job: what to bring, and each step in order, with the cautions in red. It is saved on the phone, so it works with no signal.

  1. On the job, press Job guide.
Read the job guide